How To Protect Your Home in Cold Weather will show you some of the main ways in keeping your home safe at this time of year. I got the idea to write this post when one of my friends - a new mother - found that her boiler had stopped working, leaving herself and baby freezing in the winter. Not only had it stopped working altogether, but it had done so in the coldest days we’ve had so far this winter, and it had done so when her husband was away in another city. Typical!

Cold weather can cause not only discomfort to yourself and family, it can also cause damage to your home, which in turn can leave you with unexpected bills. Here are some simple ways to keep the big freeze at bay.

How to protect your home in cold weather

protect_your_home_in_cold_weather

The trick is to get some vital things done before the cold weather sets in.

How to protect outside your home in cold weather

Clear out all the autumn leaves and moss from your guttering. You can do this yourself or hire someone to do it for you. Clear gutters vastly reduce the risk of blockages and breakages in this cold weather. If you haven’t done it yet there’s still time.

Broken or missing tiles can affect the durability of your entire roof. The last thing you want is to be caught off guard in the winter where leaks are concerned. Hire someone to take care of any maintenance roof-work. Again, if you haven’t done this yet, there’s still time to protect your home from leaks in winter. Do you know what to do in case of emergency leaks?

If you have exposed pipes outside, make sure they’re all properly insulated. Broken pipes can seriously damage your home. If you already have frozen pipes, drape hot water bottles on them until the water starts flowing again. Alternatively, you can wrap them with towels soaked in hot water. When you’ve been able to thaw the pipes, you should get some insulation as soon as possible to protect your home. It’s also a good idea to repair dripping taps to save on your bills.

Heavy snowfall can cause damage to your roof by putting too much weight on it, especially if you have old roof tiles. Nevertheless, do not go onto your roof to clear snow fall. Arm yourself with a long rake and only remove as much snow as you can safely reach.

How to protect inside your home in winter

As we said before, protecting your home in winter starts before the cold months creep in. In order to protect inside your home you need to know how to turn off your gas, electricity and water. You don’t want to have to learn this in the middle of an emergency (and they do happen).

It goes without saying, service your boiler yearly before winter sets in. You can get a really affordable boiler-servicing deal from your energy supplier.

Learn the tricks of draught-proofing or insulating your home.

Protect your home by insulating all your water tanks and pipes. This also stops heat from escaping and saves you money.

Your water tank in your loft needs rising heat from the rest of the house to keep the water from freezing in extreme temperatures (especially at night). Make sure that no loft insulation is under it, blocking this heat from getting to it (you can learn how to insulate your loft here).

Make an emergency box. Pack a plastic, sealable box with some stuff you may need in extreme cold emergencies. Make sure the members of your family know where this box is and top it up each year. Items can include: torchlight, baby stuff, tinned food, blankets, important phone numbers, first aid kit, vital medications like inhalers etc, matches and candles, pet food, radio and batteries etc.

Now you’re armed with some general ways in protecting your home in cold weather. Make sure you check that you’ve done these because you still have time to make a difference. What are some of the ways in which you protect your home in cold weather? Please share them with us in the comment boxes below. As always thanks for visiting DIY Projects. Please share this article on your favourite social networking sites and make us smile :-)

The best paint colours for your front door are always those that make a bold statement. The paint colours on your front door should also say something about your personality and should be easy to keep clean. Not all of us can actually paint our front doors. Mine, for example is one of those thick, heavy front doors, made from layers of double-glazed PVC and glass, built for safety - not for beauty. If you’re one of the lucky ones with a wooden front door, you have the privilege of making the best of what your house can really look like with the added paint colour. Before we look at paint colours, read this article if you need some lessons in painting.

Additional recommended reading: exterior design ideas and DIY security for your home


4 Best Paint Colours for your front door

Top paint colour 1: Bright red or Moroccan-red front door

This is probably the most popular front-door paint colour (in the UK). It’s brave, bright and bold. Your house stands out in your street when you use this paint colour on your door. I think, of all the paint colours, Moroccan red shows up well and will go with simply any house colour. If I could paint my front door, it would be this colour. It’s perfect against this white background. Yellow, cream and light blue houses also look stunning with a red front door. This paint colour complements even dull, grey brick or red-brick homes.

paint_colours_your_front_door

Moroccan red front door


Top paint colour 2: Lemon or yellow front door

yellow_front_door

yellow front door

A lemon door is fabulous in the bright months of summer. It’s beautiful and will go well with most house colours (not as universal as red, though). This paint colour will always brighten up your neighbour’s day and will welcome you when you return home from work. It’s a bold and intimate colour for a front door and will be perfect if you have flowers in your front garden. Just imagine your yellow front door in the background, with flowers waving gently in the wind. The mixture of green leaves off trees and the brown earthy colours of the front garden all come together to produce something really romantic indeed! In the winter this paint colour also brings a bit of sunshine to your life. It’s always bright and beautiful and no weather condition will ever darken this paint colour.

White, cream, yellow, pale blues and pale greens houses go well with yellow front doors.

Top paint colour 3: Royal or dark blue front door

A Royal blue front door is a wise choice when it comes to paint colours. It’s dark enough not to show up when it’s dirty, but it’s not black, so it still retains some interest and colour on your house in the street. The beauty of the royal blue paint colour is that it looks amazing on any type or size of house. It can make any house look great. This paint colour is a very popular choice for a lot of people, but the good news (if you want to be different) is there are several different shades of blue available to choose from.

Like red paint colour, blue is also quite versatile and can complement most house colours. It looks especially beautiful on white and light blue houses, but not so great on red-brick ones.

dark blue front door


Top paint colour 4: pale green front door

I’ve always fancied myself in a cottage with a light green door. This is an unusual colour for a front door, but I included it in this list because I’ve seen it on a few houses, and was really impressed by the understated beauty of this paint colour. In the summer it looks inviting and calming against the bright sunlight. In winter, even the whiteness around, and the grey sky do not negate the attractiveness of this front door colour. Of course, this paint colour cannot be used on any house. Red brick, white, grey and very pale cream houses look great with a pale green front door. If your house is any other colour - forget it. Another point to note is that because this is a light colour, make sure your DIY skills are up to scratch before you paint your door, otherwise you run the risk of visible brush strokes. This is not a good look for the front of your house.

paint_colours_for_front_door

light green front door

Conclusion: Paint colours: your front door

Regardless of what paint colours are popular, the ultimate choice remains with you. As we said before, the colour of your front door reflects something about you, your home and your personality. Also make sure you’ve got a good idea of how to prepare wood before painting. Two-thirds of the painting job is the preparation. The finished look always depends on how well you’ve prepared the surface. As always, it’s great to have you here. Please share this article if you found it inspiring. Leave your comments and ideas in the comment section please. We’d also like to hear from you if you think your front door colour says something about your personality and if so, what?

You may like to read our extreme home makeover series to see what other changes (in and around your home) will make the most impact. We also show you how to use colours inside your home to make it more homely and beautiful. In the meantime, here’s a beautiful Welcome Front Door vinyl wall decal that looks great on any colour front door. The best thing about it is that it’s not cheesy like most other items of this sort. It’s also easy to apply. Your guests will all be asking you where you got it.

Diy projects brings you a step-by-step article on how to paint a room. Any proficient painter will tell you that the most important thing to a perfect paint finish is the preparations. We’ve already shown you in this do-it-yourself tutorial, how to prepare your walls for painting the right way. Please study that article before you read this one. That home improvement article also shows you how to first remove your wallpaper before any of the work starts. For the wooden parts of your room (like your door frames and skirting boards etc, how to paint wood will show you exactly what you need to do.

Now let’s show you how to paint a room


You will need:

Paint tray

Masking tape

Paint roller

Brush

Wet cloth to wipe spills (wet wipes will do).

Painting made easy

The primer should take a couple of hours to dry. At this point, you’ve removed the wall paper (and wallpaper lining where applicable), cleaned the glue off the wall, filled the holes and gaps, sanded the filler, dusted the wall (for loose sandy particles), primed the wall and sealed the edges. Now your wall is ready to take your nice, expensive paint you’ve spent so much money on. These easy steps will help your painting go more smoothly.

1. Put masking tape at the edge of the ceiling (like in the picture below), at the top of the skirting board (the wooden bit at the bottom of your wall), around all door and window frames, and at the edges of your wall. If you’re painting the entire room the same colour, you don’t need to worry about applying masking tape at the edges (like in the middle of the picture below). The top, bottom and around door/window frames will do.

masking-tape-wall-edge

carefully put masking tape as directed above

2. Paint the top of the wall (horizontal edge - between the ceiling and wall) with a paint brush. Also, use your brush to apply paint at the left corner (vertical edge) of the wall. Don’t do the entire horizontal and vertical edges before you start painting with the roller. Half of each is okay. You want these brush-applied paint (different texture) to still be wet before you use the roller. You want to be able to blend these two textures of paint.

3. Use your roller to apply paint onto the wall. Paint in all directions, but make sure your last strokes are up-down (for uniformity). Make sure your roller touches and covers/blends the paint you applied with the brush. Don’t leave brush strokes. If you can see the strokes when the paint is wet, you’ll see them when it’s dry too. Just use your eyes for a nice uniformity.

4. Repeat step 2 (horizontal and vertical edges) for the rest of the wall. Then continue painting with your roller.

5. Cover your entire wall in this manner.

Points to note when painting your room

1. Cover your floor with old sheets or layers of newspapers. No matter how careful you are, paint will spill onto your floor. Same for your clothes.

2. Most paints require at least 2 coats (regardless of what the manufacturers tell you). Emulsion paint (the paint you apply on walls) mostly take about 2 hours between coats. Wood paint will need up to 24 hours before it can be re-coated.

3. Try to paint both coats of paint on the same day. Remove masking tape when second coat of paint is still wet. If you leave it to dry on you run the risk of taking your beautifully applied (new) paint off with the masking tape. Many of them (masking tapes) are good, but always be on the safe side. I’ve had to learn by experience.

4. If you’re painting the wooden bits in your room when doing your home improvement, paint them first. It’s easier to wipe emulsion paint off the wood (use a wet cloth), than it is to wipe oil paint off your freshly painted wall (use white spirit).

5. It’s a good idea to have a wet cloth at hand while painting your room. Drips on the skirting board (for example) can be wiped off straight away to save yourself the trouble of scrubbing later on.

If this ‘How To Paint A Room’ diy tutorial has helped you please share it with someone else who may benefit from it. We’d also appreciate it if you shared it on your favourite networking site. If you have any questions please leave them in the comment box below. And while you’re here, we’re sure you’ll find the other articles in the diy tutorials series a great help with your diy projects.

Can you share other painting tips you’ve picked up over the years?

What was the last room you painted, and what colour did you use?

Removing wallpaper can be a chore even if you’ve done it before. This article is based on personal experience, with months of trial and error. During our extreme home makeover, (which took months and involved shifting an entire house load of wall paper- literally!) I learned how to remove wall paper fast, how to remove wall paper borders, how to remove wall paper the wrong way, and how to remove wallpaper easily and with the minimum of stress. This article will not only show you the easy way to remove wall paper, it will show you the entire process of this diy project from start to finish. Remove your wallpaper, remove your wallpaper lining, fill holes and cracks in the wall, sand your wall, then prepare your walls for painting. How To Paint Walls is coming soon.
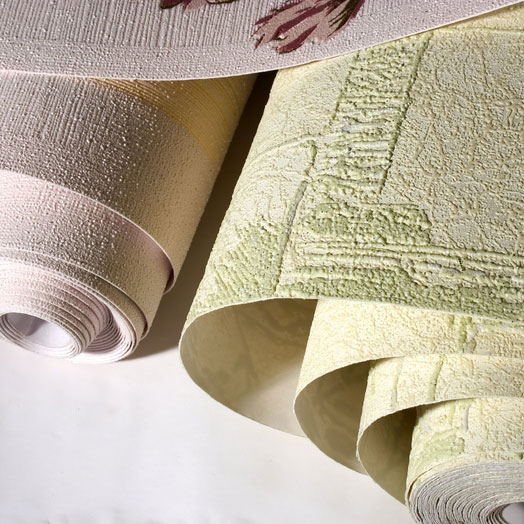
 

Removing wallpaper

As with all diy projects, you can choose expensive stuff that do the same thing as everyday products you can find in your home. This article concentrates on cheap things that work well. You don’t need wall-paper remover products available from diy shops. I tried several of them and none of them worked as well as the stuff I stuck with through the projects, and to the end.

rolls_of_wallpaper

What you need to remove wallpaper

A wall-paper removal knife. The sharper it is, the better it is at removing wall paper. However, you have to be careful with it when it’s new because it can actually scrape the old plaster from the wall if you dig in too hard. Be careful. Moderation is key here.

A spray bottle. Any type will do. However, the bigger, the better.

A small bucket or bowl

Cotton scrap cloths or rags

Lots of old newspaper

Method of removing wallpaper

1. Spread old newspaper on the floor as thickly as possible. You’ll be using water, so you need to protect your floor. If possible, use old sheets or dust cloths under the paper. The reason for using the paper is because when the wet wallpaper is lying on the floor, it’s easy to roll them up into the newspapers and recycle them properly. Cleaning up is easy if you don’t have to pick tiny pieces of sticky paper off your dust sheets.

2. Check the wallpaper to see if the top layer will come off by just pulling it off dry. If you can do this, you’re lucky. Your project will be a lot easier than you think. It’s important to check first before wetting the paper because if you wet the paper, the wall paper glue may become activated and stick to the wall - you don’t want this to happen.

3. Fill up your spray bottle and small bucket with hot water (from your hot tap). Add some fabric softener to the spray bottle - nothing else. Put nothing into the water in the bucket. Hot water + fabric softener!

4. So you’ve now checked that the wallpaper can’t just be torn off dry. We have to use the wet option. Spray the water from your spray bottle generously over the wallpaper. Work from one corner and wet the wall from top to bottom in a 2-foot increment. Don’t do much more than this.

5. Leave wallpaper to soak for 10 minutes. This is a very important step.

6. After 10 minutes (at least) apply step 4 to another 2-foot increment and leave this to soak while you do step 6 below.

6. Start from the edge (usually at the top because less wallpaper glue was administered at the very tip). Peel off wallpaper. If you also have wall-paper lining do steps 4 and 5 on this lining and continue on.

7. Soon you’ll get into the rhythm of all this. Do 2-foot increment wetting of the wall-paper while you peel the 2-foot area you did previously. Remember that if your wall paper is difficult to get off, just keep wetting the wall paper while you’re peeling (and leaving to soak). This works. Wetting the paper releases the glue hold on it. This is from personal experience.

8. Once you’ve removed the wall paper (and/or lining), use your cotton rag and hot water from the small bucket and wash your wall. I found doing this all at the same time makes the job easier because the glue is ready to come off the wall once the paper has been removed. Leaving it to dry on again creates additional work. If the glue holds on to the wall strongly, use your sharp blade to carefully scrape it off while it’s wet. Be careful not to scrape the plaster off the wall.

9. Once all the glue has been washed off, wipe over with your cotton rag and leave to dry. (You’ll have time to do this while your wallpaper soaks). Next step: fill holes and gaps, then sand filler.

How to fill holes and gaps in your wall

Once you remove the wallpaper (and lining if applicable) off your wall, you may notice some holes and/or cracks in your plaster. These have to be taken care of before you paint your walls, or else your finished paint job will look unfinished and horribly amateur. The temptation will be strong to just paint once the old wallpaper has been removed off the walls, but as with any other diy project, good preparation is required for your home makeover to be truly stunning.

This article, How To Repair A Hole In The Wall is a detailed tutorial, telling you exactly what you need to do to repair holes and gaps in your wall. It can definitely be done as you can see in these pictures.

living_room_makeover

cracks and holes filled and sanded

living_room_makeover

the transformation after wallpaper was removed, holes were filled, and paint was applied

The above article I linked for you (How to Repair A Hole In Your Wall) shows you how to:

Fill holes in walls

Sand the filler (then dust the wall lightly)

Prime the surface


All of the above are vital steps to prepare your wall for painting, after removing the wallpaper. You can prime your walls with a mixture of cheap white, matt paint and water. Don’t buy the expensive stuff because the cheap stuff works just as well. The above linked article also gives you the exact measurements where this mixture is concerned.

Extra tip to prepare walls for painting: it’s important to prime the surface because the paint may not stick onto the filler readily. If you have walls that have been wallpapered (on old paint) it’ll be a great idea to still prime the surface. Our walls were never painted before the original wall paper was applied. Old paint, covered for years in wall paper will still need priming in my opinion.

Once you’ve primed the wall there is one last step before you paint - it’s sealing the corners, top and bottom of wall and around the door frame. Look at the image below:

rough_edges

rough edges

Once you remove the wallpaper, there will be rough edges between each corner, between the ceiling and the wall, and around door frames. They should look smooth (without gaps). You need a flexible sealant - in a sealant gun is easiest. Apply this according to the manufacturers’ recommendations.

sealing_edges_walls

use a sealant gun to apply flexible sealant

smooth_edge_wall

smooth edges should look like this after sealant is applied

Okay, now you’ve learned how to remove wallpaper and prepare walls for painting. Stay tuned for the next article on how to actually paint your walls from start to finish. Always keep in mind that a well-prepared surface is vital for a professional-looking finished job. For more diy tutorial ideas, check out this page on this site.

As always, thanks for joining us and taking part in the discussion.

Image source: http://www.hometips.com/catimages/010907_wall_wallpaper_rolls.jpg


When it comes to painting wood and wooden furniture, time, effort and know-how all play key roles in what the finished job looks like. Care has to be taken when you remove paint from the old paint job in preparation for your project. This tutorial will show you exactly what you need to know, and how to paint wood.


Removing paint from wood

Ideally, you shouldn’t use paint removal substances on wood, unless it’s totally necessary. Look at the pictures of un-painted wood (or old wood) below to see great examples of how old paint jobs can look. Is this what you’re faced with?

how_to_paint_wood

unpainted sections of wooden landing

The first thing you need to do is get rough grade sand paper and start sanding. Sanding wood in preparation for painting not only removes the old, flaky paint from the surface. Sanding wood removes dust particles stuck in the wood, takes care of old drips and thick, unsound painting jobs, and (most importantly) gives your brand new, expensive paint, somewhere permanent to stick to.

If you were to paint without first sanding, you’d be doing yourself a disservice because the new paint can only look as good as the surface it was put on. Bad - or not enough - preparation will cause your new paint to flake out fast.

Flaky and chipped paint have to be removed

In the picture below, notice that you can virtually remove the old paint with your fingernails. Painting on this surface would result on the new paint chipping off in a few months.

how_to_sand_wood

close-up of what parts of the stairs looked like before sanding

Preparing wood to be painted

1. Go over the wooden surface to get rid of all all staples, nails, splinters, or any other sharp objects that can damage your hands.

2. Use a paint-removal knife (I also use a wall paper scraper - it works just as well) to take off any thickly-covered painted areas where the paint had been put on thicker than in other parts. Using the knife, scrape away at the old paint until it’s all gone. If there are any edges where the raw wood meets the paint, go over these with the knife to make sure the joins (paint + raw wood) are smooth and not flaky.

3. Sand the wood thoroughly, paying keen attention to: (a) where raw wood meets painted sections (like in the first picture), (b) where bulges and drips were left from the old paint, and (c) flaky painted bits (like in the second picture).

sanded_wood

now all the flaky paint is gone

At last, all the flaky, old paint has been sanded off. You’ll still be able to see layers underneath (if there are any), but all surrounding areas and areas sanded, should feel smooth to the touch. If you can feel a ridge between the top layer and the ones underneath, you need to sand some more.

Finished painted surfaces

painted_wood

all new, painted wood

newly_painted wood

as good as new, painted wood

Cleaning wood to be painted

1. Once sanding is complete, you should carefully sweep up all the dust and particles. Some DIY shops will tell you you need special cleaning agents for this job, but you don’t necessarily (unless you don’t mind spending extra for no reason). When you’ve thoroughly swept the area, clean carefully with a cotton cloth. You can use an old piece of cotton, or a micro fibre cleaning cloth if you wish. If you have any vodka or mentholated spirit in the house you can use these on the cloth. If not, just clean twice with your old, cotton rag.

2. Make sure you put masking tape around the area you want to paint to protect your other paint work and surfaces. You’re now ready to put your brand new paint onto your well-prepared surface!

Painting wood

All manufacturers give detailed information on the paint can/tin. Follow these and you’ll be fine.

Some important things about painting wood:

1. Use a good brush. Cheap brushes shed and give you more work (you have to constantly remove shed bristles from your project).

2. Give your DIY paint project enough time to dry. Again, manufacturers tell you how long.

3. Darker surfaces need more coats of paint if your new paint is a lighter colour/shade.

4. You shouldn’t paint wood with emulsion paint (made for painting walls), it won’t last. However, you can see how I used it in spicing up old wardrobes, and using beach stones as home decorations.

4. Most (not all) wood paint requires you to stir thoroughly before use. Do so because the oils can settle on the top. This discrepancy and unevenness will show up unfavourably in your new work.

5. If you’re putting more than one coat on (and you probably need to - regardless of what the manufacturers say on the tin) lightly sand the first coat to give the last one a good home to soak in.

6. Don’t paint outdoor wood with interior paint - it won’t last. You’ll be wasting your money.

7. Wood paint are available in matt, silk, eggshell (some makes) and gloss. Matt is flat. Silk and eggshell are slightly shiny. Gloss is highly shiny and reflective.

8. Always have ample ventilation when painting.

Now, you’re ready to prepare and paint your wood surface or wooden furniture. If you need any more tips or advice on painting wood, don’t be shy about leaving me a question in the comment section. As always, thanks for dropping by. If you’ve benefited from, or enjoyed this post, please share it on your favourite networking sites. Other articles on painting include: How to prepare your walls for painting, and painting your room.

Find more articles about DIY on this page;


My friend had this old chair stored in her shed. She used it to stand on to paint in the past, and eventually it was banished to a permanent place in the shed outside. It was the perfect height and size I wanted for the desk in the den, and even though I could afford to buy a new chair, I was getting this one for free and knew I could do something good with it. This article will show you how you too can transform an old chair into something beautiful for your home.
COST: £0.00 (If you already have a stock of sandpaper, left over paint, and a staple gun, this project will cost you nothing.)
TIME: 2 and a half hours - not counting paint-drying time. Wood paint usually needs 24 hours before you can apply a second coat. This project needs 2 coats of paint.

recover_old_chair

the original chair to be transformed

Transforming the chair

What you need:

Left over material
Some gloss paint (for wood)
Sandpaper
Staple gun and staples

First: sand all the wooden parts of the chair completely

sand_chair_makeover

sanding the chair

Note: Tighten loose screws

Glue loose wooden bits together

Remove the soft seat part of the chair

Then turned your attention to the paint work. Give the entire chair, including the back and legs, a good sanding with coarse sandpaper. Now it was structurally perfect and ready for the paint!

When you’ve done all of the above, paint the chair in gloss or satin paint made for wood. Follow all the manufacturer’s recommendations and leave to dry. You may need 2 coats of paint for this job.

Second: take off seat and recover with fabric

recover_chair

recover chair

At the time of taking these pictures, I’d put the new seat cover over the old one. I later ripped them both off and used only the new material on the bare sponge. This was because the finished product was too thick to sit properly in the wooden structure. If (like me) you’re using a thick material to cover the seat, you may need to remove the original one before you start work. This green material I’m using came from my mother-in-law. She had given us a couch covered in this same cloth. She had some left over, and as this chair was going to be put in the same room as the couch, it made perfect sense to use this material.
Method
1. Take off old cover.
2. Place it on new fabric and cut around.
3. Fold fabric around the side of the seat and staple to the underside.
4. Replace seat when paint is completely dry.

Finished, transformed old chair

newly_covered_chair

new, revived chair

Now the chair looks like it came with the couch. You too can have a brand new chair for free! Please share your experiences in how you’ve transformed old chairs in your own home. Don’t forget to check out the other articles on other stuff you can make for your home for more beautiful interiors. Please share this article on your social networking sites if you’ve enjoyed it. Thank you.

Having storage space under your stairs can be a good thing. However, it can make your home look dull and encourage a dated atmosphere. Everyone knows that if you have a space for junk, junk will build up until it spills over into your living areas. Now you can say no to clutter because I will show you how to pimp your understairs cupboard and still have storage room left in it! All this - almost free.
What you can do with your storage cupboard under your stairs
Before
understairs_cupboard

dull, old understairs cupboard.

After
updating_understairs_cupboard

haven to sit and talk on the phone

Here’s what we did to pimp our understairs cupboad: This top picture was taken on the day I came to view the house. The red carpet was smelly and old, and screamed, dump me, dump me! It was nice there was storage space, but I thought I could do something nicer still with it. I wanted the hall to extend out and give a feeling of space and elegance. The white door seemed to be in the way, stopping the flow of the hall (which was a nice size to begin with).


The good thing was, that once we’d remove the red carpeting in the hall, we realised that there was some old lino on the floor beneath it. This was better than the carpet and we lived with that for the time being.

strip_carpet_off_stairs

stairs, carpet-free

repairing_damaged_wooden_stairs

the extent of damage on the wooden stairs

The carpet has now been removed, and the door is also gone, but as you can see above, the damage on the wooden stairs was so intense, it took months to fill all the holes, sand and paint the stairs. Nevertheless, this was a far cry better then the old, red carpet.


Transforming the understairs cupboard

Once we’d finished painting we decided that the floor, though raw wood, would look better without the old lino. It was removed and the floor was stained with cheap wood stain. This will have to stay until we can do better. You can see the complete effect in the ‘after’ picture above. The floor looks rather good.


wood stain makes a brilliant change

updating_understairs_cupboard

understairs room - daytime chic

understairs room - night time elegance


What we did to pimp our understairs cupboard:

Removed the cupboard door.
Painted the cupboard the same colour as the rest of the hall.
Painted the skirting board the same colour - this joines both spaces and fools the eyes into thinking the two spaces are one room.
The floor was also stained, carrying the same colours and effects though.
Drilled a hole into the bottom of the wall in the cupboard and ran an extension cord into it from the living room. This enabled us to put a light into the dark space.


The storage boxes were spray-painted white. Spraying them is easier than painting because of the holes.
Cushions were placed on the boxes and a painting was placed on the wall. Choose a painting that compliments the colour of your wall.
Attach your phone on the wall and you have a telephone heaven in which to sit and talk for hours if you want.
The rest of the cupboard on the left hand side is still used for storage. Shelves and free-standing cupboards have been put there. You see them, but your guests don’t.


What the understairs room cost


We had all of the furniture, the soft furnishing, the light (hook on) and the painting. Left over paint from the hall was used. Nothing was bought specifically for this project except for the spray paint used to spray the boxes. They used to be natural wood. This cost about £3.00 in total. The spray paint was also used on other little things in the house.

Please share this article on creating an extra room out of your understairs cupboard if you found it helpful. As always thank you for joining the diy projects site. Follow the link for more DIY tutorials. There are several more articles on home improvement on this site.

With thanks to Twisted Web Solutions
http://ourdiyprojects.net/privacy-policy/ http://ourdiyprojects.net Blogroll