Take one week-end, a couple packs of crisps, some junk food, a spare couple of hands, and you’re ready to spice up and update the old, boring wardrobe in your bedroom. Here’s what I did to mine.
Spicing up dull wardrobes
How to spice up your wardrobe:
Spice up your old wardrobes
You definitely do not have to go out and buy new cupboards. It’s not worth the mess and cost. In this case all we did was remove the surplus cupboards and add a mirror. We changed the outdated door handles, then painted the front of the smaller cupboards. Add a vanity stool like this one we bought to finish the look - if you like. This is a simple fix, but it’s cheap and looks great. Here’s the complete make-over of the room in question.
And once you’ve finished spicing up your dull wardrobes, you can also see several other ways of improving your interior design cheaply and quickly. This page tells you how - and how much they’ll cost. You can also see great things to make for your home at affordable prices.
DIY security for your home will give you some simple tips on how you can properly secure your home without paying too much for it. Many security companies offer complicated security and alarm systems for your protection. While these are good, not all families can afford what they cost. Besides, with a few precautions of your own, and some well-placed deterrents, you can keep your family, yourself and your home protected. The warmer weather is arriving and people are beginning to take their annual vacation (holiday). This is the time of year in which burglary increases, so before you go away make sure you have done the following:
DIY security for your home
DIY security for your home 1: CCTV Security Camera
You can install a CCTV security camera yourself. No criminal wants to take the chance of being caught on camera, even if it’s a home-installed one! Besides, if you hide the VCR (where it’s being taped) in a good enough place, they’ll have to spend the first half hour of the burglary trying to find it so they could take the tape out of it. This is not a good investment of time - even for a burglar.
DIY security CCTV cameras move around too. People in my neighbourhood have theirs panned onto their car, which is parked in the drive. I always keep my distance when I’m passing by in the mornings to take my daughter to school. The last thing I want is to be filmed too close to the car - and I’m a law-abiding citizen doing nothing wrong.
DIY security for your home 2: motion sensor lights
DIY fitted motion lights are very simple to fit. They’re cheap and easy to obtain from any DIY shop. The hardest thing is fitting the bracket to the outside wall. All you need to do next, is find a suitable place to plug your light in. Burglars hate bright lights. If you have one just above your front and back doors (which come on with motion) anyone who approaches will be flooded with light. Burglars love to work in the dark, and they can spot these motion sensor lights a mile off. Security for your home have never been easier. I’ve installed these lights on the outside of every house we’ve lived in.
DIY security for your home 3: have secure windows
You may not be able to fit your own windows, but the life of double glazing is prolonged if you take care of them properly. Every 6 months you should clean off the dirt from between all the working, metal parts, then oil them with WD40 to keep them working well. It’s terribly hard to break into double glazed windows, especially when they’re locked shut. If you’re away a lot, or before you go away on holiday, lock all your windows and keep the keys hidden out of sight.
DIY security for your home 4: have secure external doors
The condition of your external doors can make the difference between a burglar attempting to break in or not. Your doors should look secure, even from the outside. Take care of all rotten wooden parts or broken glass etc. You may not think it’s important, but when you come to claim insurance (in case of a burglary) your insurance company will make it very important indeed, and may even refuse to give you the payout you ask for. Always treat wood to keep them in good condition and check that there are no broken panes. A door that looks like it’s taken care of appears more secure from the outside.
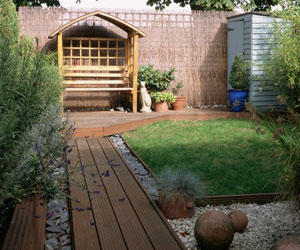
DIY security for your home 5: side gates and sheds
Purchase good, sturdy locks for your side gate and shed. It may seem like a chore to open them each time you need access, but wouldn’t you rather do this than run the risk of being burgled? A house (and surrounding) that look secure, often are. This is the message you want to give to a potential burglar when they eye-up your property. You don’t want to invite them in by showing how unconcerned you are with security. Someone who opens a gate and walks through can be mistaken for you (by your neighbour). Someone who climbs over a gate attracts attention from even a casual passer by. Make burglars have to climb over and out themselves.
You also need a lock on your shed so that burglars can’t access your tools and ladders and use them to break into your home. More on exterior care at the link.
DIY security for your home 6: fences and hedges
When it comes to security for your home, fences play a key role in keeping your property safe. It’s advisable to plant prickly plants near your fences as deterrents. A high fence with a trellis at the top is also ideal for stopping prowling burglars. They won’t want to climb over a trellis because they can’t hold an adult’s weight. In addition to this, if your trellis has got a prickly plant growing from it they know you mean business. If you have a hedge with no fence, make sure you have adequate thorny plants that hurt.
DIY security 7: burglar deterrents
Burglars don’t like hard work. It’s one of the reasons they won’t get a proper job. Therefore, making your home harder to break into is a sure way of making it less attractive to potential burglars. If you have an alarm system, use it. However, if you don’t there are other little things you can do to make your home a more difficult target for breaking into, especially if you’re away. Here are some deterrents you can use. I’ve also put a link (at the bottom of this page) to an affordable alarm system you can hook up yourself.
When you’re going to be away get timers for your lights so that your house isn’t completely dark (or the lights aren’t on all the time).
Set your TV on a timer to come on the usual time you watch TV. The noise and flashing blue lights from the screen gives the impression someone’s home.
Some people also play barking dogs’ tapes. I haven’t tried this so can’t vouch for it. It would be a bit weird if you haven’t usually got a dog, though.
Keep all keys hidden out of sight (not visible from the windows).
Tell the neighbours you’re going away and when you’re coming back.
Cancel milk and papers deliveries.
Ask a friend to come by and change the appearance of your home - open curtains, pick up mail, park in your drive etc.
Do you have any other DIY security for your home we may find helpful here? Have you ever been burgled and what was the point of entry? If you liked ‘DIY Security for your home’, please share it on your favourite social networking sites. Thank you.
Image source for post image: http://www.sum-security.com/images/burglar%20alarms%20london.jpg
Do you pay much attention to exterior design ideas or do you just concentrate on the inside of the house? As you all know, this blog was started after we decided to redecorate and redesign an old house we’d bought. I’ve taken you through most of the interior makeovers we did around the house. It needed a complete overhaul and there’s not an inch of the home my fingers haven’t been over - several times. Most of this is finished and you can see the results at the link.
Spring is around the corner and some (yes, only some) of my efforts will be turned to the outside of the property. We can’t do as much as we’d like at the moment, but that set me thinking about the exterior design ideas which will make the best impact on your home.
Exterior design ideas
Exterior design starts with your front door
I did a post here about front doors. Paint colours not only tell a little about the people who live in the houses, your choice of colour can really impact on the overall image of the house. Always make sure your front door looks great from the outside. It’s the first impression your guests - and random passers-by have of your home. Like a personal first-impression, there’s no second chance, so get it right. Even if your door isn’t new, keep it clean, well looked-after and free from weed etc. A good paint job, a nice mat, an interesting door-knocker, and a few potted, well-groomed plants all count towards an impressive front door.
Plants make a large impact on your exterior design
Add plants to your front garden. They don’t have to be expensive plants. They just have to be well-looked after. If you don’t have the time it takes to care for a hanging basket it’s better not to have one. Go for yukka or grasses and other low-maintenance plants if you’re busy. If you have a completely paved area at the front of your house, get some large plant pots and place them around your front door. Different sizes and shapes work better together.
Fences are important in your exterior design
There is little point in having the most expensive front door when you have a run-down fence that needs attention. The fence at the front of your house should be well cared for and maintained. It doesn’t have to be a brick fence to be sturdy. Wooden fences make quite an impact if they’re painted (or treated) and are upright. If wooden fences are too difficult to maintain, you can consider pvc fencing and pvc railing, which are much more durable and look a lot nicer. Fences are also important for security reasons. The police force has noted that if you give the first impression (with your fences, gates, windows etc) you’re serious about security, you’re less likely to be burgled.
Exterior design ideas can be personal - not eccentric
Your tastes will obviously play an important role in your exterior design ideas. Door mats, door knockers and house numbers - for example come to mind. If your taste is very eccentric, it’s probably better to give into this at the back of your house. It’s better to fit in with the general ‘feel’ of your neighbourhood in terms of design. This means that you may have to paint that huge wooden wheelbarrow and use it to plant flowers in your back garden. Your house number may have to remain just the average plaques the neighbours have, and that driftwood may have to be transformed into the back of a bench at your back door.
Exterior design ideas for the back garden
Most people in the UK use a combination of decking, plants and clever painting to create impact in their back gardens. The only problem with decking is that it can be difficult to maintain if you’re very busy. I grew up in South America where a lot of the house had verandas. One of my utmost dreams for our home, is to have a veranda at the back of the house. We’ll have to wait a few years to get that, but I’m definitely going to use pvc decking to get the job done. After all these years of waiting, I don’t want the maintenance jobs that sometimes can accompany wooden decking. I already have my veranda design planned out, even though it may be 5 years before we can afford it!
Do you have any other exterior design ideas? What have you done outside your house that has impacted the most? Please leave your ideas in the comment boxes below. If you liked ‘Exterior Design Ideas’ please share it on your social networking sites. Thank you.
The best paint colours for your front door are always those that make a bold statement. The paint colours on your front door should also say something about your personality and should be easy to keep clean. Not all of us can actually paint our front doors. Mine, for example is one of those thick, heavy front doors, made from layers of double-glazed PVC and glass, built for safety - not for beauty. If you’re one of the lucky ones with a wooden front door, you have the privilege of making the best of what your house can really look like with the added paint colour. Before we look at paint colours, read this article if you need some lessons in painting.
Additional recommended reading: exterior design ideas and DIY security for your home
4 Best Paint Colours for your front door
Top paint colour 1: Bright red or Moroccan-red front door
This is probably the most popular front-door paint colour (in the UK). It’s brave, bright and bold. Your house stands out in your street when you use this paint colour on your door. I think, of all the paint colours, Moroccan red shows up well and will go with simply any house colour. If I could paint my front door, it would be this colour. It’s perfect against this white background. Yellow, cream and light blue houses also look stunning with a red front door. This paint colour complements even dull, grey brick or red-brick homes.
Top paint colour 2: Lemon or yellow front door

yellow front door
A lemon door is fabulous in the bright months of summer. It’s beautiful and will go well with most house colours (not as universal as red, though). This paint colour will always brighten up your neighbour’s day and will welcome you when you return home from work. It’s a bold and intimate colour for a front door and will be perfect if you have flowers in your front garden. Just imagine your yellow front door in the background, with flowers waving gently in the wind. The mixture of green leaves off trees and the brown earthy colours of the front garden all come together to produce something really romantic indeed! In the winter this paint colour also brings a bit of sunshine to your life. It’s always bright and beautiful and no weather condition will ever darken this paint colour.
White, cream, yellow, pale blues and pale greens houses go well with yellow front doors.
Top paint colour 3: Royal or dark blue front door
A Royal blue front door is a wise choice when it comes to paint colours. It’s dark enough not to show up when it’s dirty, but it’s not black, so it still retains some interest and colour on your house in the street. The beauty of the royal blue paint colour is that it looks amazing on any type or size of house. It can make any house look great. This paint colour is a very popular choice for a lot of people, but the good news (if you want to be different) is there are several different shades of blue available to choose from.
Like red paint colour, blue is also quite versatile and can complement most house colours. It looks especially beautiful on white and light blue houses, but not so great on red-brick ones.
Top paint colour 4: pale green front door
I’ve always fancied myself in a cottage with a light green door. This is an unusual colour for a front door, but I included it in this list because I’ve seen it on a few houses, and was really impressed by the understated beauty of this paint colour. In the summer it looks inviting and calming against the bright sunlight. In winter, even the whiteness around, and the grey sky do not negate the attractiveness of this front door colour. Of course, this paint colour cannot be used on any house. Red brick, white, grey and very pale cream houses look great with a pale green front door. If your house is any other colour - forget it. Another point to note is that because this is a light colour, make sure your DIY skills are up to scratch before you paint your door, otherwise you run the risk of visible brush strokes. This is not a good look for the front of your house.
Conclusion: Paint colours: your front door
Regardless of what paint colours are popular, the ultimate choice remains with you. As we said before, the colour of your front door reflects something about you, your home and your personality. Also make sure you’ve got a good idea of how to prepare wood before painting. Two-thirds of the painting job is the preparation. The finished look always depends on how well you’ve prepared the surface. As always, it’s great to have you here. Please share this article if you found it inspiring. Leave your comments and ideas in the comment section please. We’d also like to hear from you if you think your front door colour says something about your personality and if so, what?
You may like to read our extreme home makeover series to see what other changes (in and around your home) will make the most impact. We also show you how to use colours inside your home to make it more homely and beautiful. In the meantime, here’s a beautiful Welcome Front Door vinyl wall decal that looks great on any colour front door. The best thing about it is that it’s not cheesy like most other items of this sort. It’s also easy to apply. Your guests will all be asking you where you got it.
This tutorial shows you how to make a fabric picture easily, quickly and cheaply. Beautiful interiors do not have to come at a price or take ages to achieve. This site hosts a tremendous amount of ideas for stuff you can make for your home to improve the general appearance so once you’ve made your fabric picture, look around for some more splendid ideas you’ll have fun doing. Let me know how you get on, or send me a message if you’re having difficulty with this project.
How to make a fabric picture
What you will need (see thumbnail image above)
Scissors
A piece of fabric (choose something that goes with your existing interior design)
A cheap picture frame (or use an old one you already have). You can get some strong, cheap ones from the link if you like.
Any kind of paste which is usable on fabric
Cost of job: £0.00 if you have an old picture frame. Otherwise you can purchase one for £1.00 from a charity or discount shop.
Duration of job: 20 minutes
Making your fabric picture
1. Take off the back of your picture frame. Then carefully remove the cardboard behind it, the picture, then the glass. You can discard the old picture or use the back of it if your old frame does not have a cardboard in it.
2. Put the glass, the empty picture frame and the cardboard to one side. You will need the back of your picture frame (the solid part at the back of the frame) next.
3. In order to get the right measurement for your fabric picture, place the back of the picture frame against the piece of cloth you wish to use. Measure and cut the cloth to exactly the same size as the back of the picture frame. When this is done, use a suitable glue to paste the fabric onto the picture frame back, then place to one side to dry.
This is what the third step should look like. Leave a millimetre around the edges of the picture frame back if you like. This will help if you have to trim rough edges off the fabric - for example.
4. We’re now going to work with the cardboard you removed from the inside of the picture frame. If your old picture frame doesn’t have one, you can easily make one from stiff paper or thin cardboard. Just measure the back of the picture frame and cut the piece of cardboard/paper the same size. Otherwise, if you’re brave enough, just use the back of old picture for this step.
Take this cardboard and measure out two squares. (Squares or rectangles look better than other shapes because most picture frames are square or rectangle. Keeping within the same shapes looks good in interior design.) Follow what I’ve done in the picture below. Remember to leave the edges of the cardboard intact! I’ve also left the middle intact for an optional step.
Optional step in making fabric picture
Use a colour pencil to draw a suitable design on the middle (where the cardboard has been left intact). You can also colour around, or design the edges of the squares if you like. If you don’t wish to do this, you can leave your cardboard plain. My personal design uses the former style.
5. Clean the glass you removed from the picture frame and carefully replace it. Your fabric picture is almost complete. Replace the cardboard you’ve cut around also. Last of all, replace the back of the picture frame (where you stuck the fabric). Secure.
Your fabric picture is complete. All you need to do now is to find a suitable place to hang it. I did this twice and created two pictures out of plain pictures and picture frames.
If you don’t have time for this process you can always go to this page. It’s jam full of picture frames and other associated products
.
If you liked this article on how to make a fabric picture, please share it on your favourite networking sites or with someone who will benefit from it. As you’re here, why not check out the other tutorials in home improvement. Also, don’t forget to watch out for the next article in our extreme home makeover series. As always, thanks for your visit to DIY projects. Now, please leave your comment.
Living room design - before extreme makeover
The end of the living room design is nigh. All the holes and cracks have finally been filled in readiness for paint.
New living room design - after extreme makeover
Now for the other sides of the living room extreme makeover.
The radiator wall is finally finished, but the window wall is the last to be done.
Working area design in living room space


Top Commentluvvers
Recent post : NYC Weddings: Planning a One of a Kind Wedding
Recent post : Steinepreis Paganin is happy to announce the addition of Matt...
Recent post : Things to Know on How to Style your Deck
Results since : 17th Oct
Will reset on : 27th Oct