When it comes to painting wood and wooden furniture, time, effort and know-how all play key roles in what the finished job looks like. Care has to be taken when you remove paint from the old paint job in preparation for your project. This tutorial will show you exactly what you need to know, and how to paint wood.
Removing paint from wood
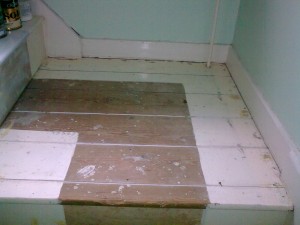
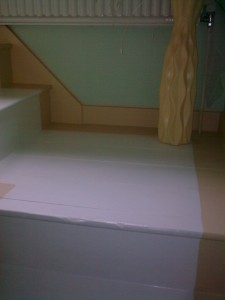
Ideally, you shouldn’t use paint removal substances on wood, unless it’s totally necessary. Look at the pictures of un-painted wood (or old wood) below to see great examples of how old paint jobs can look. Is this what you’re faced with?
The first thing you need to do is get rough grade sand paper and start sanding. Sanding wood in preparation for painting not only removes the old, flaky paint from the surface. Sanding wood removes dust particles stuck in the wood, takes care of old drips and thick, unsound painting jobs, and (most importantly) gives your brand new, expensive paint, somewhere permanent to stick to.
If you were to paint without first sanding, you’d be doing yourself a disservice because the new paint can only look as good as the surface it was put on. Bad - or not enough - preparation will cause your new paint to flake out fast.
Flaky and chipped paint have to be removed
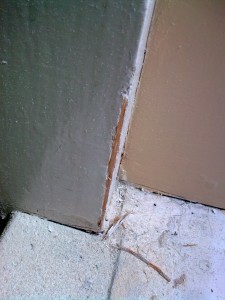
In the picture below, notice that you can virtually remove the old paint with your fingernails. Painting on this surface would result on the new paint chipping off in a few months.
Preparing wood to be painted
1. Go over the wooden surface to get rid of all all staples, nails, splinters, or any other sharp objects that can damage your hands.
2. Use a paint-removal knife (I also use a wall paper scraper - it works just as well) to take off any thickly-covered painted areas where the paint had been put on thicker than in other parts. Using the knife, scrape away at the old paint until it’s all gone. If there are any edges where the raw wood meets the paint, go over these with the knife to make sure the joins (paint + raw wood) are smooth and not flaky.
3. Sand the wood thoroughly, paying keen attention to: (a) where raw wood meets painted sections (like in the first picture), (b) where bulges and drips were left from the old paint, and (c) flaky painted bits (like in the second picture).
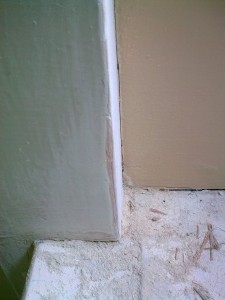
At last, all the flaky, old paint has been sanded off. You’ll still be able to see layers underneath (if there are any), but all surrounding areas and areas sanded, should feel smooth to the touch. If you can feel a ridge between the top layer and the ones underneath, you need to sand some more.
Finished painted surfaces
Cleaning wood to be painted
1. Once sanding is complete, you should carefully sweep up all the dust and particles. Some DIY shops will tell you you need special cleaning agents for this job, but you don’t necessarily (unless you don’t mind spending extra for no reason). When you’ve thoroughly swept the area, clean carefully with a cotton cloth. You can use an old piece of cotton, or a micro fibre cleaning cloth if you wish. If you have any vodka or mentholated spirit in the house you can use these on the cloth. If not, just clean twice with your old, cotton rag.
2. Make sure you put masking tape around the area you want to paint to protect your other paint work and surfaces. You’re now ready to put your brand new paint onto your well-prepared surface!
Painting wood
All manufacturers give detailed information on the paint can/tin. Follow these and you’ll be fine.
Some important things about painting wood:
1. Use a good brush. Cheap brushes shed and give you more work (you have to constantly remove shed bristles from your project).
2. Give your DIY paint project enough time to dry. Again, manufacturers tell you how long.
3. Darker surfaces need more coats of paint if your new paint is a lighter colour/shade.
4. You shouldn’t paint wood with emulsion paint (made for painting walls), it won’t last. However, you can see how I used it in spicing up old wardrobes, and using beach stones as home decorations.
4. Most (not all) wood paint requires you to stir thoroughly before use. Do so because the oils can settle on the top. This discrepancy and unevenness will show up unfavourably in your new work.
5. If you’re putting more than one coat on (and you probably need to - regardless of what the manufacturers say on the tin) lightly sand the first coat to give the last one a good home to soak in.
6. Don’t paint outdoor wood with interior paint - it won’t last. You’ll be wasting your money.
7. Wood paint are available in matt, silk, eggshell (some makes) and gloss. Matt is flat. Silk and eggshell are slightly shiny. Gloss is highly shiny and reflective.
8. Always have ample ventilation when painting.
Now, you’re ready to prepare and paint your wood surface or wooden furniture. If you need any more tips or advice on painting wood, don’t be shy about leaving me a question in the comment section. As always, thanks for dropping by. If you’ve benefited from, or enjoyed this post, please share it on your favourite networking sites. Other articles on painting include: How to prepare your walls for painting, and painting your room.
Find more articles about DIY on this page;
Let me show you how to add interest to plain wall paper. Not many people like to remove old wall paper when doing home-improvement. They’re afraid of what they may find under it, as crumbling and cracked walls can be disguised with the cunning use of wall paper. We removed all the wall paper in our old house (each square inch was covered with paper). We were lucky with some rooms, and not so lucky with others. This article will show you how I added interest to plain wall paper on the sole wall in the house which remained papered.
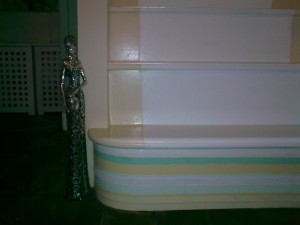
The walls in bedroom 1 was particularly bad, so after removing the paper off 3 of the walls, I was wary of tackling the window wall. I decided to leave the wall paper on and do something interesting with it. It was originally plain magnolia (see picture below).
How you can add interest to plain wall paper
The old wallpaper had some faint indentations that followed a line. I merely used a small brush and painted within these lines. I used 2 alternating colours - the very ones I bought for the rest of the bedroom walls. I then covered the entire area with one layer of clear varnish to keep the hard work intact. The original wall-paper was drab and frankly, depressing to anyone who slept in the room. The easy option was to just paint the paper one flat colour, but there was a more royal alternative.
The various links below will take you to helpful articles on this blog, which show you how to improve your home and do your own DIY projects. They’re being added to and updated regularly, and as this is a new blog, I urge you to check back for newer articles on a regular basis.
DIY projects for your home
How To Tile A Wall
How To Draught-Proof Your Home
How To Properly Insulate Your Loft
How To Fit Internal Doors
How To Drill Holes
Fixings You Need For DIY
How to Repair a Dripping Tap
How To Repair A Hole In The Wall
What To Do When Water Pipes Burst
Loft insulation
Door draft excluder
Safety gloves and glasses
Sealant gun
Letter box excluder
Safety mask
Pipe insulation
Door frame sealant tape
Stanley knife
Tape measure
Masking tape
Club hammer
DIY Tools and Fixings are not things you’ll know about if you’re new to DIY. The range of DIY tools and fixings out there may be a bit confusing to you. What do you need for what job? How do you use the fixings and where. This article gives you a breakdown of what DIY tools and fixings you need for your tool box (the main ones). It will answer your questions and at the end of it, you should have a basic idea about DIY fixings and tools in general. Here are some of the things you will need to prepare yourself for the job of fixing, screwing, nailing and other essential DIY jobs around the house.
Add these to your tool box, and don’t forget that you don’t need the best or most expensive DIY tools around. Whatever you need for your DIY jobs can be bought at the discount shop. They work just as well.
DIY Tools
6. Screws, nails, wall plugs
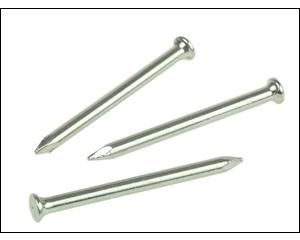
Types of nails you need for DIY
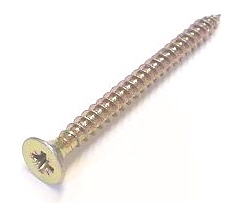
Types of screws for DIY
Single threaded screws: these are used mainly for man-made products like chipboard and MDF. Their threads and points are sharp, which makes them easier to drive and hold secure.
All purpose (multi-purpose) screws. Use for anything from wood, to masonry walls (when used with a wall-plug).
Dry wall screws: use these for pinning plasterboard to stud walls. Stud walls are hollow walls built with wooden studs and plasterboard. Some parts of the wall are hollow, hence the term.
Self-tapping screws: these have sharp threads which cut a hole for themselves while they’re being drilled into the material. Use for masonry or metal surfaces.
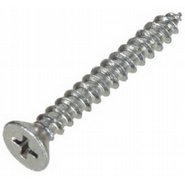
There are also different types of screw heads. Keep this in mind when buying screws, as they all have their different purposes. Of course, you can swap one for the other, but some jobs require a certain type of screw head to give you a perfect finish. The three main types are: (images below the descriptions).
Countersunk heads. The heads are triangular-shaped and tapered off beneath the top part. These are brilliant for sinking below the surface of the material used (skirting boards, for example). You can then fill above the head of the screw and finish off with paint. This will give you a smooth, professional finish.
Dome heads. The rounded heads of these screws stay visible above the surface of the material. They are used for hanging pictures or for metal screwing, for example.
Raised heads. The most common type of screws. They’re used with door furniture, for example.






Top Commentluvvers
No one has commented since the last reset. Leave an approved comment and your site name and latest post will be shown here
Results since : 8th Nov
Will reset on : 23rd Nov