DIY security for your home will give you some simple tips on how you can properly secure your home without paying too much for it. Many security companies offer complicated security and alarm systems for your protection. While these are good, not all families can afford what they cost. Besides, with a few precautions of your own, and some well-placed deterrents, you can keep your family, yourself and your home protected. The warmer weather is arriving and people are beginning to take their annual vacation (holiday). This is the time of year in which burglary increases, so before you go away make sure you have done the following:
DIY security for your home
DIY security for your home 1: CCTV Security Camera
You can install a CCTV security camera yourself. No criminal wants to take the chance of being caught on camera, even if it’s a home-installed one! Besides, if you hide the VCR (where it’s being taped) in a good enough place, they’ll have to spend the first half hour of the burglary trying to find it so they could take the tape out of it. This is not a good investment of time - even for a burglar.
DIY security CCTV cameras move around too. People in my neighbourhood have theirs panned onto their car, which is parked in the drive. I always keep my distance when I’m passing by in the mornings to take my daughter to school. The last thing I want is to be filmed too close to the car - and I’m a law-abiding citizen doing nothing wrong.
DIY security for your home 2: motion sensor lights
DIY fitted motion lights are very simple to fit. They’re cheap and easy to obtain from any DIY shop. The hardest thing is fitting the bracket to the outside wall. All you need to do next, is find a suitable place to plug your light in. Burglars hate bright lights. If you have one just above your front and back doors (which come on with motion) anyone who approaches will be flooded with light. Burglars love to work in the dark, and they can spot these motion sensor lights a mile off. Security for your home have never been easier. I’ve installed these lights on the outside of every house we’ve lived in.
DIY security for your home 3: have secure windows
You may not be able to fit your own windows, but the life of double glazing is prolonged if you take care of them properly. Every 6 months you should clean off the dirt from between all the working, metal parts, then oil them with WD40 to keep them working well. It’s terribly hard to break into double glazed windows, especially when they’re locked shut. If you’re away a lot, or before you go away on holiday, lock all your windows and keep the keys hidden out of sight.
DIY security for your home 4: have secure external doors
The condition of your external doors can make the difference between a burglar attempting to break in or not. Your doors should look secure, even from the outside. Take care of all rotten wooden parts or broken glass etc. You may not think it’s important, but when you come to claim insurance (in case of a burglary) your insurance company will make it very important indeed, and may even refuse to give you the payout you ask for. Always treat wood to keep them in good condition and check that there are no broken panes. A door that looks like it’s taken care of appears more secure from the outside.
DIY security for your home 5: side gates and sheds
Purchase good, sturdy locks for your side gate and shed. It may seem like a chore to open them each time you need access, but wouldn’t you rather do this than run the risk of being burgled? A house (and surrounding) that look secure, often are. This is the message you want to give to a potential burglar when they eye-up your property. You don’t want to invite them in by showing how unconcerned you are with security. Someone who opens a gate and walks through can be mistaken for you (by your neighbour). Someone who climbs over a gate attracts attention from even a casual passer by. Make burglars have to climb over and out themselves.
You also need a lock on your shed so that burglars can’t access your tools and ladders and use them to break into your home. More on exterior care at the link.
DIY security for your home 6: fences and hedges
When it comes to security for your home, fences play a key role in keeping your property safe. It’s advisable to plant prickly plants near your fences as deterrents. A high fence with a trellis at the top is also ideal for stopping prowling burglars. They won’t want to climb over a trellis because they can’t hold an adult’s weight. In addition to this, if your trellis has got a prickly plant growing from it they know you mean business. If you have a hedge with no fence, make sure you have adequate thorny plants that hurt.
DIY security 7: burglar deterrents
Burglars don’t like hard work. It’s one of the reasons they won’t get a proper job. Therefore, making your home harder to break into is a sure way of making it less attractive to potential burglars. If you have an alarm system, use it. However, if you don’t there are other little things you can do to make your home a more difficult target for breaking into, especially if you’re away. Here are some deterrents you can use. I’ve also put a link (at the bottom of this page) to an affordable alarm system you can hook up yourself.
When you’re going to be away get timers for your lights so that your house isn’t completely dark (or the lights aren’t on all the time).
Set your TV on a timer to come on the usual time you watch TV. The noise and flashing blue lights from the screen gives the impression someone’s home.
Some people also play barking dogs’ tapes. I haven’t tried this so can’t vouch for it. It would be a bit weird if you haven’t usually got a dog, though. ![]()
Keep all keys hidden out of sight (not visible from the windows).
Tell the neighbours you’re going away and when you’re coming back.
Cancel milk and papers deliveries.
Ask a friend to come by and change the appearance of your home - open curtains, pick up mail, park in your drive etc.
Do you have any other DIY security for your home we may find helpful here? Have you ever been burgled and what was the point of entry? If you liked ‘DIY Security for your home’, please share it on your favourite social networking sites. Thank you.
Image source for post image: http://www.sum-security.com/images/burglar%20alarms%20london.jpg
Do you pay much attention to exterior design ideas or do you just concentrate on the inside of the house? As you all know, this blog was started after we decided to redecorate and redesign an old house we’d bought. I’ve taken you through most of the interior makeovers we did around the house. It needed a complete overhaul and there’s not an inch of the home my fingers haven’t been over - several times. Most of this is finished and you can see the results at the link.
Spring is around the corner and some (yes, only some) of my efforts will be turned to the outside of the property. We can’t do as much as we’d like at the moment, but that set me thinking about the exterior design ideas which will make the best impact on your home.
Exterior design ideas
Exterior design starts with your front door
I did a post here about front doors. Paint colours not only tell a little about the people who live in the houses, your choice of colour can really impact on the overall image of the house. Always make sure your front door looks great from the outside. It’s the first impression your guests - and random passers-by have of your home. Like a personal first-impression, there’s no second chance, so get it right. Even if your door isn’t new, keep it clean, well looked-after and free from weed etc. A good paint job, a nice mat, an interesting door-knocker, and a few potted, well-groomed plants all count towards an impressive front door.
Plants make a large impact on your exterior design
Add plants to your front garden. They don’t have to be expensive plants. They just have to be well-looked after. If you don’t have the time it takes to care for a hanging basket it’s better not to have one. Go for yukka or grasses and other low-maintenance plants if you’re busy. If you have a completely paved area at the front of your house, get some large plant pots and place them around your front door. Different sizes and shapes work better together.
Fences are important in your exterior design
There is little point in having the most expensive front door when you have a run-down fence that needs attention. The fence at the front of your house should be well cared for and maintained. It doesn’t have to be a brick fence to be sturdy. Wooden fences make quite an impact if they’re painted (or treated) and are upright. If wooden fences are too difficult to maintain, you can consider pvc fencing and pvc railing, which are much more durable and look a lot nicer. Fences are also important for security reasons. The police force has noted that if you give the first impression (with your fences, gates, windows etc) you’re serious about security, you’re less likely to be burgled.
Exterior design ideas can be personal - not eccentric
Your tastes will obviously play an important role in your exterior design ideas. Door mats, door knockers and house numbers - for example come to mind. If your taste is very eccentric, it’s probably better to give into this at the back of your house. It’s better to fit in with the general ‘feel’ of your neighbourhood in terms of design. This means that you may have to paint that huge wooden wheelbarrow and use it to plant flowers in your back garden. Your house number may have to remain just the average plaques the neighbours have, and that driftwood may have to be transformed into the back of a bench at your back door.
Exterior design ideas for the back garden
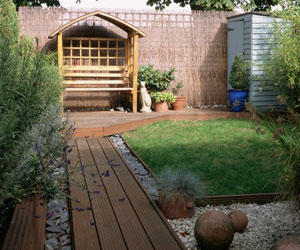
Most people in the UK use a combination of decking, plants and clever painting to create impact in their back gardens. The only problem with decking is that it can be difficult to maintain if you’re very busy. I grew up in South America where a lot of the house had verandas. One of my utmost dreams for our home, is to have a veranda at the back of the house. We’ll have to wait a few years to get that, but I’m definitely going to use pvc decking to get the job done. After all these years of waiting, I don’t want the maintenance jobs that sometimes can accompany wooden decking. I already have my veranda design planned out, even though it may be 5 years before we can afford it!
Do you have any other exterior design ideas? What have you done outside your house that has impacted the most? Please leave your ideas in the comment boxes below. If you liked ‘Exterior Design Ideas’ please share it on your social networking sites. Thank you.
How To Protect Your Home in Cold Weather will show you some of the main ways in keeping your home safe at this time of year. I got the idea to write this post when one of my friends - a new mother - found that her boiler had stopped working, leaving herself and baby freezing in the winter. Not only had it stopped working altogether, but it had done so in the coldest days we’ve had so far this winter, and it had done so when her husband was away in another city. Typical!
Cold weather can cause not only discomfort to yourself and family, it can also cause damage to your home, which in turn can leave you with unexpected bills. Here are some simple ways to keep the big freeze at bay.
How to protect your home in cold weather

The trick is to get some vital things done before the cold weather sets in.
How to protect outside your home in cold weather
Clear out all the autumn leaves and moss from your guttering. You can do this yourself or hire someone to do it for you. Clear gutters vastly reduce the risk of blockages and breakages in this cold weather. If you haven’t done it yet there’s still time.
Broken or missing tiles can affect the durability of your entire roof. The last thing you want is to be caught off guard in the winter where leaks are concerned. Hire someone to take care of any maintenance roof-work. Again, if you haven’t done this yet, there’s still time to protect your home from leaks in winter. Do you know what to do in case of emergency leaks?
If you have exposed pipes outside, make sure they’re all properly insulated. Broken pipes can seriously damage your home. If you already have frozen pipes, drape hot water bottles on them until the water starts flowing again. Alternatively, you can wrap them with towels soaked in hot water. When you’ve been able to thaw the pipes, you should get some insulation as soon as possible to protect your home. It’s also a good idea to repair dripping taps to save on your bills.
Heavy snowfall can cause damage to your roof by putting too much weight on it, especially if you have old roof tiles. Nevertheless, do not go onto your roof to clear snow fall. Arm yourself with a long rake and only remove as much snow as you can safely reach.
How to protect inside your home in winter
As we said before, protecting your home in winter starts before the cold months creep in. In order to protect inside your home you need to know how to turn off your gas, electricity and water. You don’t want to have to learn this in the middle of an emergency (and they do happen).
It goes without saying, service your boiler yearly before winter sets in. You can get a really affordable boiler-servicing deal from your energy supplier.
Learn the tricks of draught-proofing or insulating your home.
Protect your home by insulating all your water tanks and pipes. This also stops heat from escaping and saves you money.
Your water tank in your loft needs rising heat from the rest of the house to keep the water from freezing in extreme temperatures (especially at night). Make sure that no loft insulation is under it, blocking this heat from getting to it (you can learn how to insulate your loft here).
Make an emergency box. Pack a plastic, sealable box with some stuff you may need in extreme cold emergencies. Make sure the members of your family know where this box is and top it up each year. Items can include: torchlight, baby stuff, tinned food, blankets, important phone numbers, first aid kit, vital medications like inhalers etc, matches and candles, pet food, radio and batteries etc.
Now you’re armed with some general ways in protecting your home in cold weather. Make sure you check that you’ve done these because you still have time to make a difference. What are some of the ways in which you protect your home in cold weather? Please share them with us in the comment boxes below. As always thanks for visiting DIY Projects. Please share this article on your favourite social networking sites and make us smile ![]()
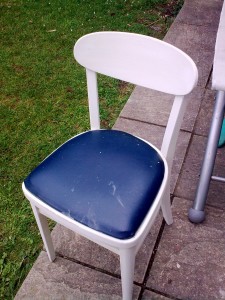
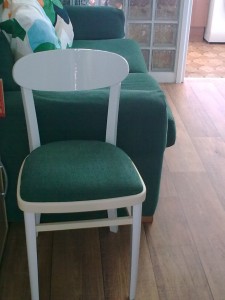
Transforming the chair
What you need:
Left over material
Some gloss paint (for wood)
Sandpaper
Staple gun and staples
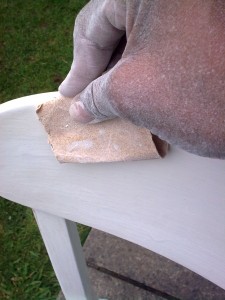
First: sand all the wooden parts of the chair completely
Note: Tighten loose screws
Glue loose wooden bits together
Remove the soft seat part of the chair
Then turned your attention to the paint work. Give the entire chair, including the back and legs, a good sanding with coarse sandpaper. Now it was structurally perfect and ready for the paint!
When you’ve done all of the above, paint the chair in gloss or satin paint made for wood. Follow all the manufacturer’s recommendations and leave to dry. You may need 2 coats of paint for this job.
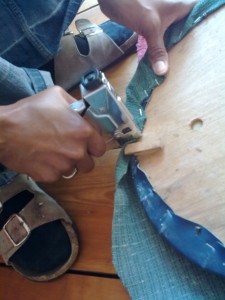
Second: take off seat and recover with fabric
Finished, transformed old chair
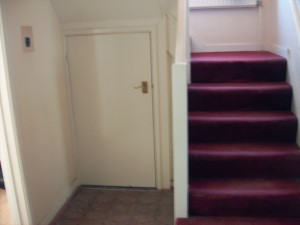
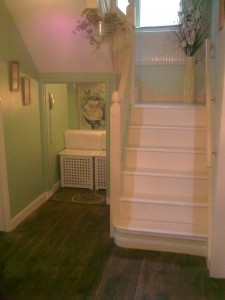
Here’s what we did to pimp our understairs cupboad: This top picture was taken on the day I came to view the house. The red carpet was smelly and old, and screamed, dump me, dump me! It was nice there was storage space, but I thought I could do something nicer still with it. I wanted the hall to extend out and give a feeling of space and elegance. The white door seemed to be in the way, stopping the flow of the hall (which was a nice size to begin with).
The good thing was, that once we’d remove the red carpeting in the hall, we realised that there was some old lino on the floor beneath it. This was better than the carpet and we lived with that for the time being.
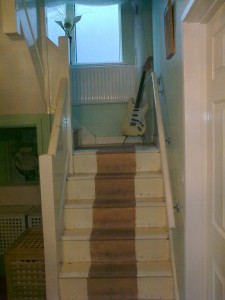
The carpet has now been removed, and the door is also gone, but as you can see above, the damage on the wooden stairs was so intense, it took months to fill all the holes, sand and paint the stairs. Nevertheless, this was a far cry better then the old, red carpet.
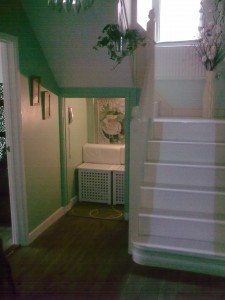
Transforming the understairs cupboard
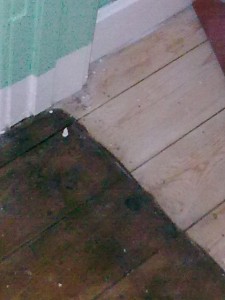
Once we’d finished painting we decided that the floor, though raw wood, would look better without the old lino. It was removed and the floor was stained with cheap wood stain. This will have to stay until we can do better. You can see the complete effect in the ‘after’ picture above. The floor looks rather good.
What we did to pimp our understairs cupboard:
Removed the cupboard door.
Painted the cupboard the same colour as the rest of the hall.
Painted the skirting board the same colour - this joines both spaces and fools the eyes into thinking the two spaces are one room.
The floor was also stained, carrying the same colours and effects though.
Drilled a hole into the bottom of the wall in the cupboard and ran an extension cord into it from the living room. This enabled us to put a light into the dark space.
The storage boxes were spray-painted white. Spraying them is easier than painting because of the holes.
Cushions were placed on the boxes and a painting was placed on the wall. Choose a painting that compliments the colour of your wall.
Attach your phone on the wall and you have a telephone heaven in which to sit and talk for hours if you want.
The rest of the cupboard on the left hand side is still used for storage. Shelves and free-standing cupboards have been put there. You see them, but your guests don’t.
What the understairs room cost
We had all of the furniture, the soft furnishing, the light (hook on) and the painting. Left over paint from the hall was used. Nothing was bought specifically for this project except for the spray paint used to spray the boxes. They used to be natural wood. This cost about £3.00 in total. The spray paint was also used on other little things in the house.
Please share this article on creating an extra room out of your understairs cupboard if you found it helpful. As always thank you for joining the diy projects site. Follow the link for more DIY tutorials. There are several more articles on home improvement on this site.
Some countries have laws in place which means you can’t remove beach stones. However, if this is the case where you live you can always ask a friend for a couple of stones or buy them cheaply from garden centres. In my case we’d inherited a whole lot of them, left in the garden, when we bought our last house. I’d also had some we brought with us from Ireland. I’ll show you two things we use them for, and they look absolutely beautiful.
How to decorate your home with beach stones
COST: £0.00
TIME: 10 minutes to make two of them. Of course you have to add time for the paint to dry in any project involving paint.
These two beach stones in the top picture were painted with left-over emulsion paint we used in the bedroom. After this was dry I painted on the symbols with more left-over paint (which is the second colour used in the bedroom).When this was dry I applied two coats of clear varnish to keep the effect in place. We’ve had these for over seven years.
Other ways to use beach stones in your home
Use beach stones in vases or on window sills for added colour and beauty. You can also use them in potted plants on top of the soil. Remember that you’ll have to use suitable outdoor paint if you plan on leaving them outside.
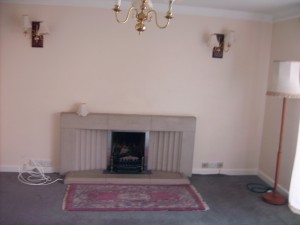
I bet you didn’t know you could transform an ugly fireplace with paint - just paint! You don’t have to spend hundreds to rip out your old fireplace and replace it. We certainly didn’t have that kind of cash. We would’ve had to pay to get it taken out and taken away because it was solid granite.As you can see, it was grey and looked like slabs of concrete chucked together. I’ll show you how you too can transform an ugly fireplace with paint.
Note: you can see how the transformation of this fireplace positively enhanced the entire living room after our make-over. It can be found at the Living Room makeover link on our Extreme home-makeover page.
Transform an ugly fireplace with paint
The new fireplace
The fireplace does look brand new! This cost us less than £5.00 I would guess. See the entire look at this living room makeover article. Of course, the time I spent on it is worth a lot more. I used brilliant white, gloss paint for wood and metal. Because I used primer under the paint, it held on properly. Always use primer on materials you’re not sure about before painting.







Top Commentluvvers
No one has commented since the last reset. Leave an approved comment and your site name and latest post will be shown here
Results since : 8th Nov
Will reset on : 23rd Nov