What you can do with your storage cupboard under your stairs
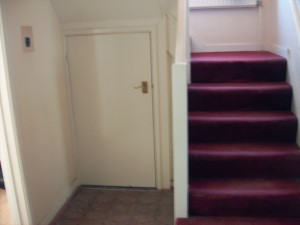
Here’s what we did to pimp our understairs cupboad: This top picture was taken on the day I came to view the house. The red carpet was smelly and old, and screamed, dump me, dump me! It was nice there was storage space, but I thought I could do something nicer still with it. I wanted the hall to extend out and give a feeling of space and elegance. The white door seemed to be in the way, stopping the flow of the hall (which was a nice size to begin with).
The good thing was, that once we’d remove the red carpeting in the hall, we realised that there was some old lino on the floor beneath it. This was better than the carpet and we lived with that for the time being.
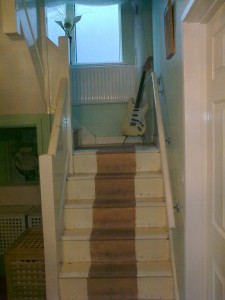
The carpet has now been removed, and the door is also gone, but as you can see above, the damage on the wooden stairs was so intense, it took months to fill all the holes, sand and paint the stairs. Nevertheless, this was a far cry better then the old, red carpet.
Transforming the understairs cupboard
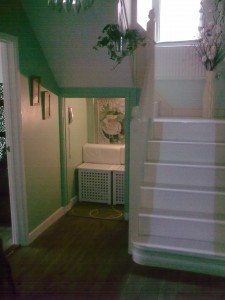
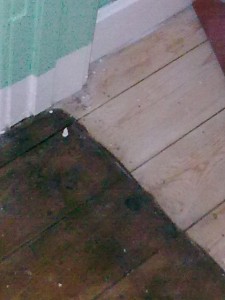
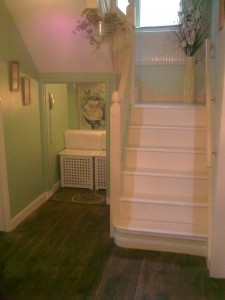
Once we’d finished painting we decided that the floor, though raw wood, would look better without the old lino. It was removed and the floor was stained with cheap wood stain. This will have to stay until we can do better. You can see the complete effect in the ‘after’ picture above. The floor looks rather good.
What we did to pimp our understairs cupboard:
Removed the cupboard door.
Painted the cupboard the same colour as the rest of the hall.
Painted the skirting board the same colour - this joines both spaces and fools the eyes into thinking the two spaces are one room.
The floor was also stained, carrying the same colours and effects though.
Drilled a hole into the bottom of the wall in the cupboard and ran an extension cord into it from the living room. This enabled us to put a light into the dark space.
The storage boxes were spray-painted white. Spraying them is easier than painting because of the holes.
Cushions were placed on the boxes and a painting was placed on the wall. Choose a painting that compliments the colour of your wall.
Attach your phone on the wall and you have a telephone heaven in which to sit and talk for hours if you want.
The rest of the cupboard on the left hand side is still used for storage. Shelves and free-standing cupboards have been put there. You see them, but your guests don’t. See more details at this article.
What the understairs room cost
We had all of the furniture, the soft furnishing, the light (hook on) and the painting. Left over paint from the hall was used. Nothing was bought specifically for this project except for the spray paint used to spray the boxes. They used to be natural wood. This cost about £3.00 in total. The spray paint was also used on other little things in the house.
Please share this article on creating an extra room out of your understairs cupboard if you found it helpful. As always thank you for joining the diy projects site. Follow the link for more DIY tutorials. There are several more articles on home improvement on this site.



Twitter: dancomtours
June 13, 2013 at 2:33 pm #
i like you ideas always enlightening!keep it up
christine davids recommends you read..A look at Africa tour package
Hey there! I could have sworn I’ve been to this site before but after reading through some of the post I realized it’s new to me. Anyhow, I’m definitely happy I found it and I’ll be bookmarking and checking back frequently!
Love this one. I've had a house in the past this would have been GREAT in!
Very cool!
Jan
Great ideas, I have one of these although without a door, need to cover it so that I can use the space without being an eyesore, thanks for the great ideas. Stopping over from Blog Jog Day.