Step by step tutorial on making your own wall curtain
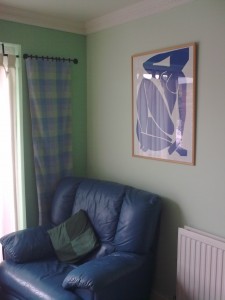
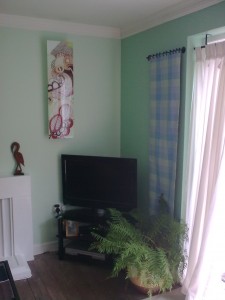
Below are two pictures of the left and right sides of the lounge window. The two wall curtains give the room a tremendous lift. You can see the overall effect in the living room makeover here. This short tutorial shows you exactly how to make your own wall curtain.
COST: £0.00
TIME: 2 hours. If you have to paint the curtain rod, this will take normal drying time before it can be put up.
Wall art is not limited to paintings and photographs in my opinion. I’ve always wanted to make a wall art out of cloth and I’ve finally done it.
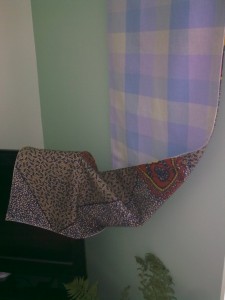
I had some left-over material from some old curtains. Because my wall colour (and a chair I got from a friend) matched the colours in the cloth, this was the perfect choice for my wall curtain. You can choose to make one of just one side. I wanted to make mine interesting and multi-use. I created curtains that were different on both sides. I’ll use this colour (above) for summer and the other side (below) for winter.

right-side wall curtain
Make your own wall curtain

choose your material, measure your space and cut

pin materials together - right sides facing outwards

smooth out all corners and sew around
If you don’t want to use two colours, it would be a good idea to line the curtain anyway. Turn in a 2cm hem on all sides and pin right sides of material to both face outward. Remember, for any DIY project, measure twice before you cut, and allow two centimetres extra on both sides, top and bottom, for turning in.

once satisfied all corners are equal, sew around

make sure 3 sides are smooth before sewing 4th
Making your wall curtain is as simple as that! Sew the four sides all around and you’re done. I used some old kitchen cupboard handles for the wall rail. I painted them so they were the same colour as my existing curtain rail (you can see the curtain rail and the light cream curtains in the second picture on this page). The paint is the same one I used on my fireplace grate. I used curtain pins to put the wall curtains up. They clip to the cloth. I had these in my sewing box for ages, but you can buy them from any curtain shop. See the complete look in my
living room make-over article.

the winter look was a piece of material my sister brought from Kenya
Tip: I glued these ‘rails’ onto the wall with a powerful DIY glue, but you can have them screwed in if you like. Now you know how to make a wall curtain. Why not go ahead and give your living room a lift! See more stuff you can make for your home here.
Please share this on your favourite social networking sites if you find it useful. Thank you.
About Anne
Anne Lyken-Garner, the owner of
DIY Projects is the published author of the inspirational memoir, Sunday's Child (available on Amazon). She's also a freelance writer, blogger and editor. She writes for, and manages 4 blogs. See how Anne can help you with editing your site at the
Hire an Editor page above.


Twitter: dancomtours
June 13, 2013 at 2:29 pm #
wonderful,am humbled for the fact that you have used kenyan fabric,i must admit we have alot here and they are very nice!nice work!
christine davids recommends you read..A look at Africa tour package
Classic very nice.. thanks for sharing.
Twitter: HardworkinJudy
April 7, 2013 at 10:18 pm #
I have made several sets of curtains and you are right, they are so simple and very economical. You can spend a lot on curtains which are not near the quality of homemade. Your instructions were very clear and concise.
Judy Sheldon-Walker recommends you read..What do you really know about coffee?
with thanks with regard to the certain article i’ve been on the lookout with regard to this kind of advice on the net for sum time these days and so with thanks